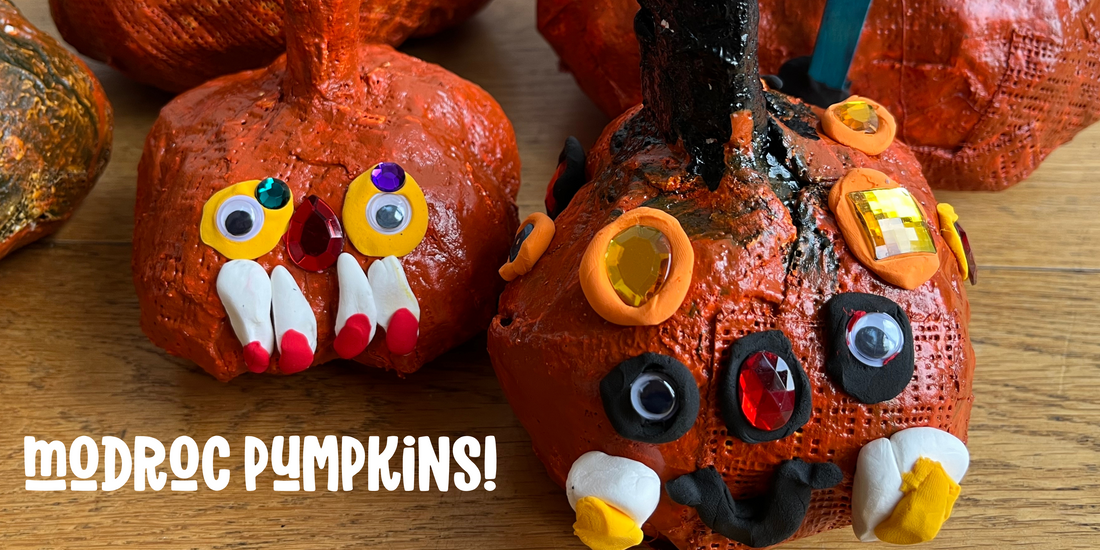
How to Make Homemade Mod Rock Pumpkins and Decorate Them with Air-Dry Clay
At Rex and Rose, we love sparking creativity in kids through hands-on crafting projects. As Halloween approaches, what better way to get into the spirit than by making your very own modroc pumpkins? These lightweight, durable pumpkins are perfect for adding a personal touch to your seasonal décor. In this step-by-step guide, we’ll show you how to make homemade modroc pumpkins and then use air-dry clay to give them some fun, unique decoration!
Materials You’ll Need:
- Bin bags or shopping bags (to form the pumpkin shape)
- PVA Glue
- Water
- Mod rock (plaster bandages) or old fabric strips. Alternatively you could use newspaper and paper mache.
- Paints & paintbrushes
- Scissors (adult supervision required)
- Masking tape or Sellotape
- String
- Optional: Rex and Rose air-dry clay
- Optional: gemstones, googly eyes, pipe cleaners, glitter, or other decorations
Please note, these pumpkins were made over three different crafting sessions as you need to leave enough time for the modroc to dry and then for the paint to dry before you can decorate.
Step-by-Step Guide:
Step 1: Create the pumpkin base. This part definitely requires adult help and supervision as it’s a bit fiddly in parts!
- Take a bag (we used a bin bag) and fill it with stuffing. We used other bin/shopping bags for the stuffing but you could use scrunched up newspaper as an alternative.
- Twist the top of the bag to secure the stuffing inside and secure with tape to form the pumpkin shape.
- Cut off the excess bag top with scissors making sure there is enough to form a stem at the top (adult supervision required).
- Now make the ridges in the pumpkin to give it a more distinctive shape. Cut a long length of string, long enough so that it can be wrapped around the pumpkin base a number of times. Secure one end of the string to the base of the pumpkin then wrap it around tightly (from bottom over the top and around the stem) so that you make grooves/indents in the pumpkin shape. Finally secure the other end of the string using tape. Ta da you have your pumpkin base!
-
Step 2: Shape your pumpkin with modroc
- Cut the modroc into small strips. If you don’t have mod rock, you can cut old fabric strips and use them with a plaster mixture or newspapers and do paper mache.
- Apply the modroc: Dip the mod rock or fabric strips in a mixture of water and PVA glue (1 part water to two parts PVA) and layer them over the pumpkin base. This will create a firm shell, making the pumpkin stronger and more durable. For a more realistic look, press the strips inwards in vertical sections to mimic the ridges of a pumpkin. the more layers the more durable your pumpkin will be.
- Let the modroc dry: This should take 24 hours depending on how thick your layers are. We did the top of the pumpkin first then once that was dry we did the bottom of the pumpkin the next day.
Step 3: Paint!
Once the mod rock is dry and hard, paint your pumpkin! We mixed together paint plus PVA glue to help make the pumpkin even more sturdy and durable. Leave to dry.
Step 4: Decorate and add Air-Dry clay Decoration
Add Faces or designs: Turn your pumpkins into magical or scary creatures with fun designs! We used our air-dry clay to create eyes, a nose, and a mouth and added other fun decorations like gemstones, sequins and matchsticks all found in our kit. Encourage your kids to get creative with their designs! You will need some more PVA glue to make decorations stick if you aren’t using air dry clay.
Let your creation dry: Air-dry clay usually takes 24-48 hours to harden, so be patient and let your pumpkin decorations fully dry.
Top tip: to make sure gemstones stick and stay in place we used a bit of glue before we applied them to the air dry clay.
Step 5: Final touches
1. Optional: Add a glossy topcoat or sealant to make your pumpkin shiny and long-lasting.
Step 6: Display your pumpkin
Once your pumpkin is fully decorated and dry, find the perfect place to display it! Whether it’s on the porch for trick-or-treaters to admire or as a fun centrepiece, your homemade pumpkin will add a personal touch to any Halloween celebration.
Making modroc pumpkins and decorating them with air-dry clay is a fun and creative project that’s perfect for kids. Not only do they get to sculpt and paint, but they also get a unique Halloween decoration that they can proudly show off. At Rex and Rose, we love inspiring young minds with hands-on crafts—so grab your supplies and let’s get crafting!
This project can be made even easier with one of our Rex and Rose air-dry clay activity kits. Get yours today and start crafting your Halloween masterpieces!

